Showing posts with label Simple Sewing. Show all posts

Tuesday, November 13, 2012

Simple Curtain Toppers

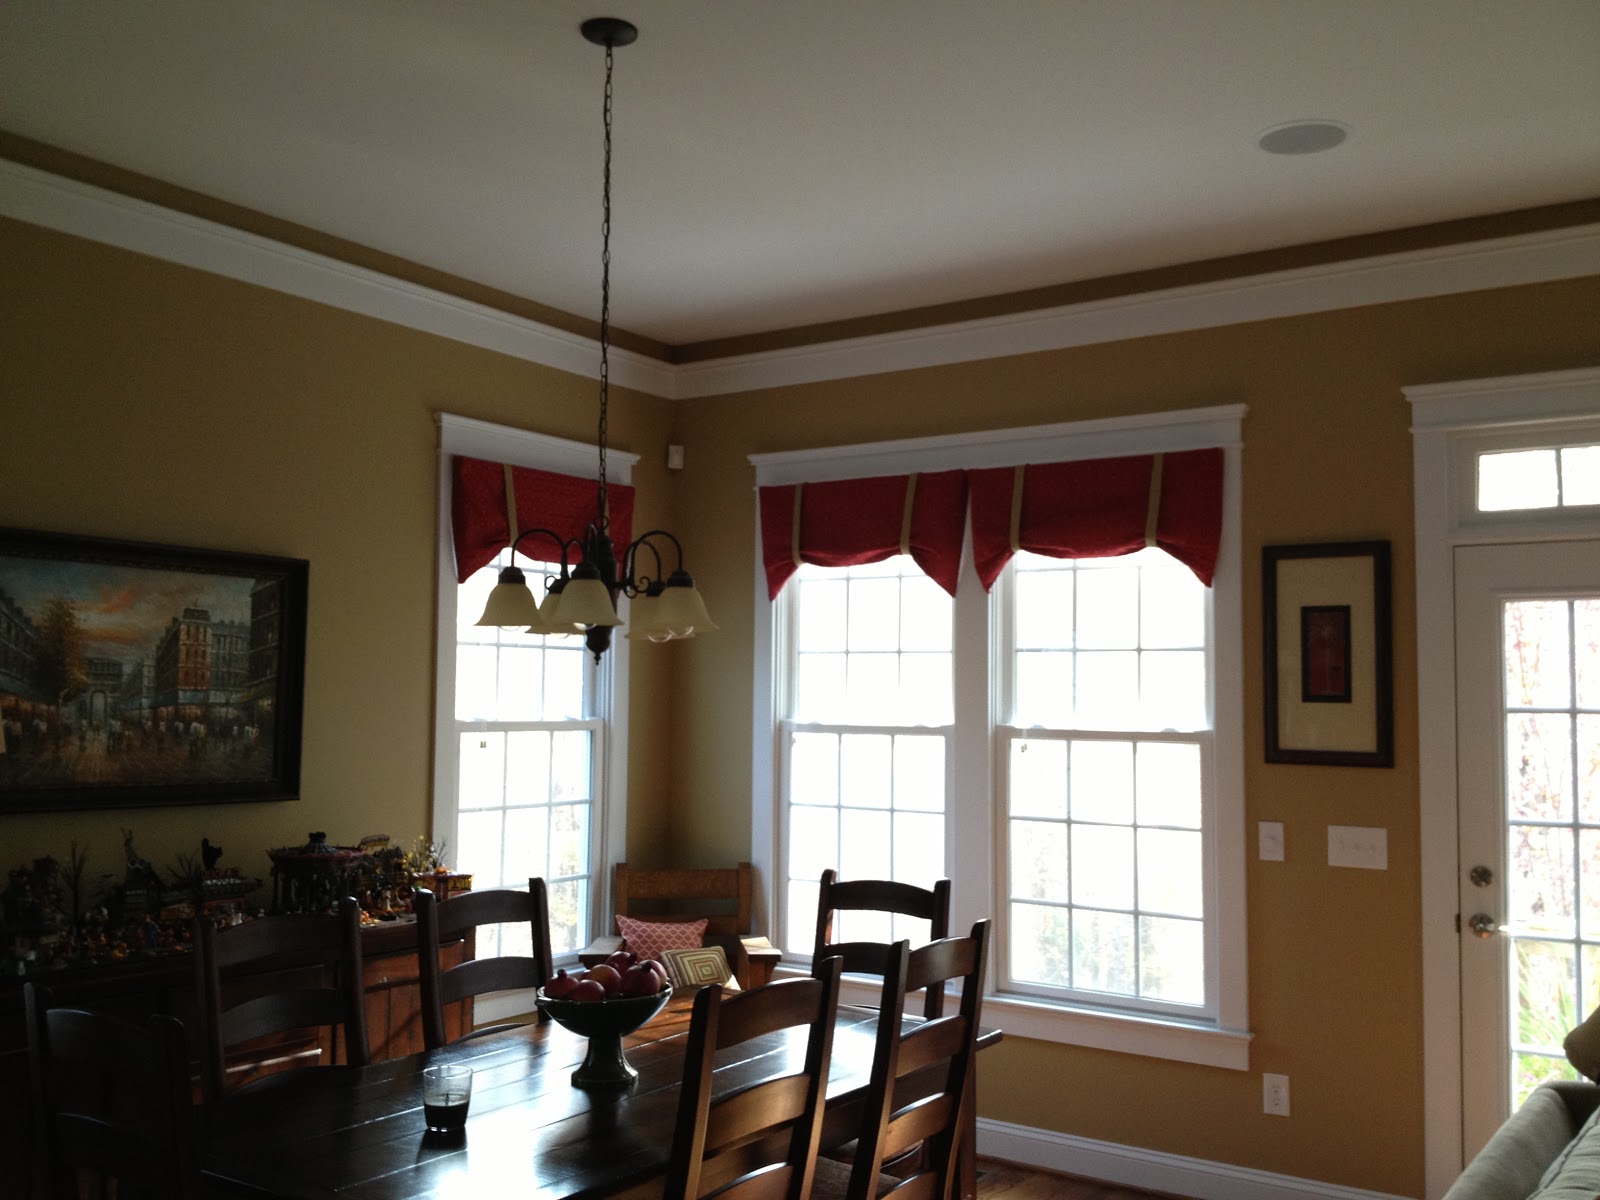
One of the things I love about our house is that the entire back is covered in windows.  We don't back up to another home, so we have a gorgeous unobstructed view of the backyard.  I wasn't interested in blocking the view but I did want to add a pop of color and soften the windows, so I decided to make some really simple toppers.  I started with this great cranberry colored decorator fabric that I found on clearance at Hobby Lobby for $7 a yard.  (LOVE clearance!)  I purchased 4 yards and still have some left over so in total I have about $30 into these toppers.  I also bought a coordinating taupe color that matched the paint color for the bands to hold them up.  My intent is to do a reverse for the window over the kitchen since the walls there are an accent red color.  I got them all stitched together and then stapled them to boards to mount above the windows.  Anyway, here they are:


 A photographer I am not...
 And another shot at night so you can see the color better...
In total, I have about $45 into this project, but there are 7 windows and I can probably get a pillow out of the leftovers.  Not bad price wise, and I love the extra color and softness they bring to the windows.  I should have guests more often, they spur me on to get projects finished!

Friday, October 26, 2012

A Quick Cushion Re-Do

I decided a few weeks ago to re-arrange my front porch to allow for more seating (since here in the south the front porch is an extension of your living room!)  so I brought the two wicker chairs down from our top porch and moved the glider over and was thrilled with the results.  What I didn't love was the worn out old cushions on the chairs.  Not only were they mildewed and faded, but the red stripe kind of clashed with the blue and brown stripe.  Just a bit.  The old cushions were over eight years old, so they really didn't owe us anything!  I really didn't want to spend any money on the redo, so I decided to see how cheaply I could do the re-do.

I started by ripping apart the old cushions.  Not only did I use the old pieces for patterns to cut out the new cushions, but I also re-used the zippers and piping cord.  The fabric I already had in my stash, it is outdoor fabric that I bought at least six months ago and never got around to using it.  Technically I guess the fabric was my only cost, I bought about three yards at maybe $8 a yard?  Don't really remember...
 I assembled the cushions by working backwards, and put the new covers over the old foam filler which was still in great shape.
 When I was all done, I had new cushions that work great on the front porch and only spent money on the fabric.  Originally I was going to get rid of the ottoman thinking it made the space too cluttered, but I do like to put my feet up with a good book, plus it makes extra seating in a pinch or a coffee table.  (And I had enough fabric so why not?)  I'm thrilled with the result!

Monday, May 14, 2012

A Little Gift for a Little One

About two months ago, a friend of mine had a new baby girl.  Admittedly I am running behind on my gifts, but this weekend it rained a lot and I was able to catch up on a lot.  This little gift consists of a hooded bath towel, a receiving blanket, and a personalized burp cloth.  I wrapped and layered them all together and tied them up in white tulle, adding a matching purple bow.  Hope she likes it!


Friday, January 27, 2012

20 Minute Curtains

I wanted to do a little something on the windows for Mistress's room, but really didn't want to put up curtains or toppers. We love the moldings around our windows, and don't want to cover them up. When we first moved in here we tried some curtain toppers in her room that matched her bedding and I hated them when I got them up! So they came down and went back to the store. I had resigned myself to having bare windows when I came up with this super simple, inexpensive, and easy way to add a bit of color and whimsy to her room.

I bought 1/2 yard each of three different colors of fabric, and pulled two from my stash. FYI, 1/2 yard was WAY too much. I only ended up needing about 3 triangles of each color, so I have tons left over. Anyway, I spent about $5 on fabric, and another $2 on 3/8 inch white ribbon. I cut a bunch of triangles using a paper triangle that I had made for a pattern. Make sure to use a pinking rotary blade or pinking shears so your fabric doesn't fray.
Then I just stitched the triangles in random patterns to the ribbon and stitched a loop at each end. A few small tack nails in the top of the molding where the holes won't be seen if they are removed and I had an inexpensive solution for curtains!
These would be great in a boy's room as well with boy colors, or in a playroom in bright primary colors. The possibilities are endless! I actually first made these several months ago for the baby shower that I helped throw, and they would be great for decor for any party you could imagine.
And here's the full effect! I love the color that it adds, and am happy with how much impact a simple little project can have. Be impressed that her room is clean, I cleaned it this afternoon and then banished all the kids to the outdoors. It was 65 and sunny here today, way too nice to be inside!

Monday, December 19, 2011

The Sixth Day of Christmas Crafts: Cloth Lunchbox Napkins

Have you ever noticed that going green goes hand in hand with being frugal? Going green saves green in a ton of ways, we have a drawer full of plastic containers that I use in the kids' reusable lunch boxes, so I never need to buy lunch bags and almost never need to use plastic baggies when packing their lunches. We have reusable juice boxes that get washed at the end of the day instead of individual (and expensive) prepackaged juice. Another way that we have gone green in our house was by replacing our paper napkins with cloth. Recently I decided to take it a step further and make cloth napkins for their lunch boxes! I found fabric to coordinate with their boxes and in about 20 minutes had two napkins to use in Mistress's lunch box.

I used two half yards of fabric that coordinated with each other. Cut two 18" squares from each fabric and put one of each right sides together. Pin around the edges.
Starting at the bottom, stitch around the edges 1/4 inch in, leaving about 4 inches open to turn it right side out.
Turn right side out, making sure to use a point turner in your corners, press. Pin the opening closed and press the hem in place.
Press flat.
Now top stitch around the edge, making sure to stitch the opening closed.
Pull your threads through, tie them off, and weave them in. If you need a refresher on how to weave threads in, check out my tutorial here.
Press again, and fold.
And now Mistress has two napkins to use for lunch. They are easily washable, and will pay for themselves in a short amount of time! I still have four more to make, and my kids will be the envy of all their friends at lunch!

The Fifth Day of Christmas Crafts: Hand Warmers

Admittedly I am behind on blogging. Not on crafting, but definitely blogging. We'll call today a catch up day...

I love quick little stocking stuffer gifts, and these little hand warmers are a great way to use up some scraps of fabric.

I used the sleeves left over from the santa coat...
...traced some shapes and stitched along the lines...
...add a little rice, stitch the opening closed, and when microwaved for 30 seconds or so these little hand warmers will keep your fingers toasty warm when slipped into your pockets on a cold day!

Thursday, December 15, 2011

The Fourth Day of Christmas: A Santa Coat

"And he made a quick Santy Claus hat and a coat."
(Did it ever bother anyone else that the Grinch didn't use his sewing machine correctly?)

I didn't make a hat because we already had one, but when your second grader informs you in the midst of Christmas prep chaos that he is going to be Santa Claus in his class program and that he needs a costume by tomorrow, you too can make a coat in less than an hour using a $6 red sweatshirt from Kmart. I bought a women's small, cut it up the center, and trimmed the entire thing with leftover white polar fleece from the storm trooper halloween costume, and in about 45 minutes came up with this:
Paired with Buggy's red elf costume from last year's preschool program for the pants, the hat we already owned, and a belt that I'll find tomorrow, and we have a 7 year old Santa. I'm off to make a beard out of white felt and stuffing. See you tomorrow!

Wednesday, December 14, 2011

The Third Day of Christmas Crafts: Monster Tooth Pillow

While technically not an actual Christmas craft, this Monster Tooth Pillow became a necessity today when Buggy lost his first tooth! His favorite color is yellow, and I had some of this yellow chenille left over from another project. I combined it with a couple of random buttons, some white felt that I had in my stash, and about 20 minutes and created this little guy for that special first tooth. I tried to convince him to leave it outside his door so the tooth fairy could find it easier, but alas, he insisted on his nightstand. Did I mention his door squeaks? Sigh...

Monday, December 12, 2011

The First Day of Christmas Crafts: Printing on Fabric

I make no promises, but I will make my best effort to make 12 Days of Christmas Crafts, starting today so that I will end on December 24th. Enjoy day 1!
I've been wanting to try using fabric in my computer printer ever since I saw it done on Pinterest. I found a great tutorial here and decided to combine it with this adorable pillow I found here. I can never do anything exactly as it tells me to though, so I changed a few things up a bit, namely adding border fabric around the printed phrase. I also used osnaberg instead of burlap, mostly because I already had some. This entire project was made with things I already had on hand, so it didn't cost me a dime!

Here's my phrase, all printed out. I was a little nervous putting fabric into my new printer, but it worked great and truthfully the fabric isn't much heavier than cardstock and that has always worked fine.
I trimmed my definition to the size I wanted and got busy adding the decorative fabric. Although I have no pictures, I just basically cut four strips of fabric 3" wide and stitched them to the edges, pressing the seams open and flat when I was done. Easy peasy! Then I decided that 3" was too much, so I trimmed it down to 1".
I lined the pillow with some warm and natural batting so that my stuffing wouldn't be lumpy and came up with an adorable pillow that works great with the ones we already have! If I had it to do over again, I probably would have just used the osnaberg and omitted the accent fabric, this is cute but I like the simplicity of the plain fabric. Who knows, maybe I'll get another one done this year yet, but until then this one works just fine!

Sunday, October 2, 2011

A Purplicious Baby Shower

Purple is not a color I have much experience with. Every woman on my mom's side of the family hates the color, and therefore I never gave it much thought growing up. As luck would have it, Mistress LOVES purple and has picked it as her favorite, and I have begun to realize that I actually like it as well. (Sorry Mom!) So when a friend and I decided to throw a shower for a neighbor having a little girl, we decided to branch out past the traditional color for girl baby showers and go with a purple theme!

First off, the wine charms. I made these using scrapbook paper, a little ribbon, and several oval shaped punches. After printing off different baby themed words in purple on white card stock, I added layers of light purple card stock and dark purple polka dotted paper, and finished the whole thing off with purple ribbon. We served a non-alcoholic purple punch (really good) in martini glasses rimmed with purple sugar. Everyone knew which glass was theirs!
The purple sugared martini glasses...
A closer look at the glass tags...
On the left, the purple punch. We put the canisters on white cake pedestals so that it was easier to get the glasses under the spouts. On the right, ice water. We thought it would be really cute to float purple grapes in the water for some extra color. Just so ya'll know, grapes sink. Live and learn...
For some simple decorations, we made some purple and white pom poms to hang from the chandelier and a purple bunting to hang across the tops of the windows. The bunting was really easy and SO cute! Seriously, 20 minutes worth of time and about $3 worth of fabric and ribbon. I'm sure there will be bunting in my house somewhere soon. I'm thinking over Mistress's windows...
A closer view of the bunting...
When it came to food, we kept it simple. A fruit tray, a veggie tray with red pepper hummus, purple and white yogurt covered pretzels, nuts, and a cheese a cracker tray. Because you HAVE to have sweet at a shower though, my partner in crime made these amazing lemon blueberry cupcakes with purple frosting. YUMMO! I have no photographic documentation, but we also used purple receiving blankets in lieu of table cloths and let the mommy to be take them home for use when baby gets here.
We didn't do any games, just enjoyed chatting with each other. We did do one fun thing for the mommy to be though, everyone wrote her a note on a diaper (using a purple marker, of course) so that when she has those late night changes she'll know that we're thinking about her. Now we're just looking forward to meeting little Miss B in a few weeks!

Friday, September 9, 2011

An Outfit for a Special Girl!

Just thought I'd give you a peek at an outfit that I finished yesterday for a very special birthday girl! I had purchased all this fabric a few weeks ago to make this skirt, added a monogram to a plain white tee from Target, and finished it off with a little headband to match. I even had enough fabric left over to make a matching skirt for Mistress. I love the way it turned out, hopefully Miss E will feel the same!

A Cradle For Baby

For over a year now, Mistress has been the proud owner of a doll cradle. An adorable doll cradle from Pottery Barn Kids that has sat without bedding in the corner where it was not soft enough (her words) for the babies to sleep in. So, the babies slept in the cradle that Uncle built for her and the white one was just a storage unit for the unlucky babies who were piled up when Mommy wanted the room clean. Yesterday Mistress told me that she needed more beds because the babies needed to spread out and sleep, so I finally got around to a 20 minute project that should have been finished a year ago.
I started with some flannel from my stash, (because don't forget I'm not buying anything this month) and a tiny little baby blanket that she got when she was born.
Then with two rectangles of flannel, three layers of leftover batting, and 20 minutes, I made a small mattress for the bottom of the cradle. Now Mistress's babies can sleep in total comfort and I have one more project finished up!

Saturday, September 3, 2011

A Pleated Headband

Continuing from yesterday, I decided to make a hair accessory to go with the skirt I made for Mistress. This one is EASY PEASY, and really doesn't involve much sewing at all. I found this tutorial for a pleated headband and was dying to try it! The only thing I did differently was to use regular old elastic for the headband part since 1. I only had one elastic headband in my possession and I use for running so I wasn't about to give it up, and 2. I'm not allowed to buy anything since it's Stashbusting September and our budget freeze month! I just measured her head, stitched the loop closed, and made sure the seam was under the felt.

Pulling from my stash, elastic, buttons, and leftover fabric from yesterday.
How cute is this little head? The headband just makes it cuter!
Just like her Mama, she loves photography! Say cheese!


Friday, September 2, 2011

My First Stashbusting September Project!

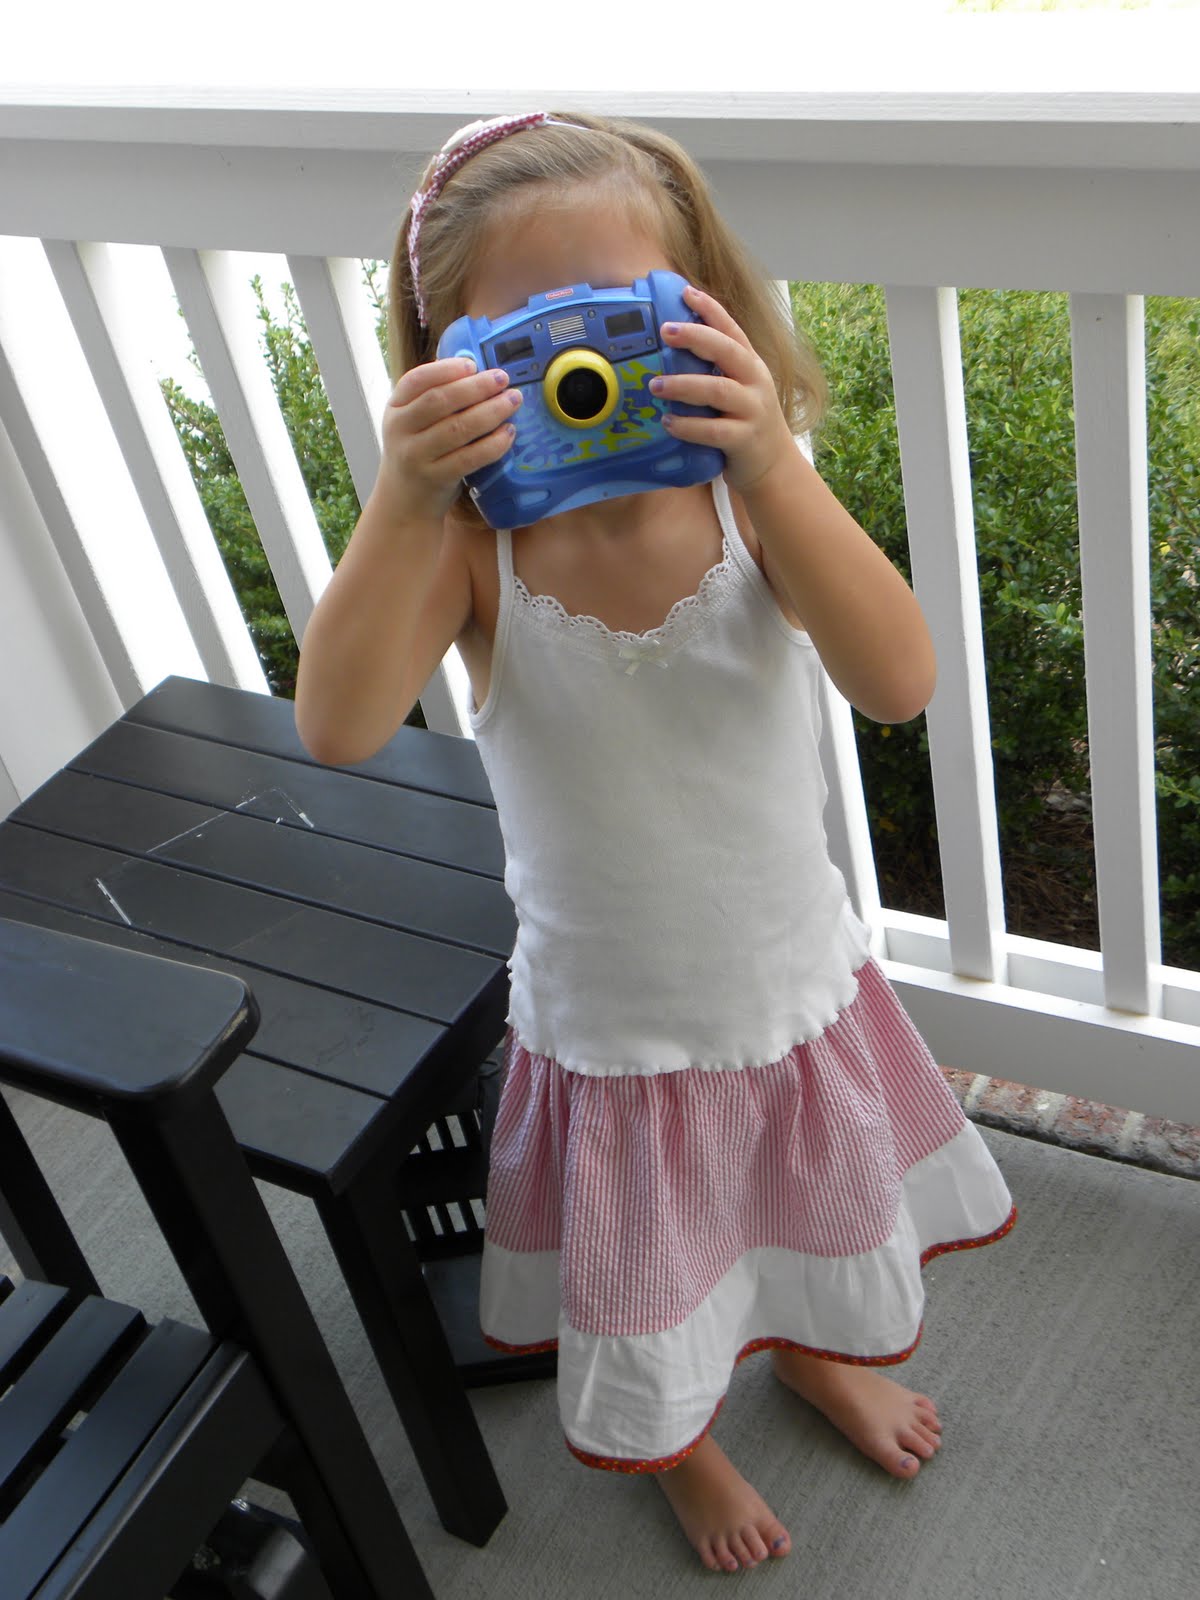
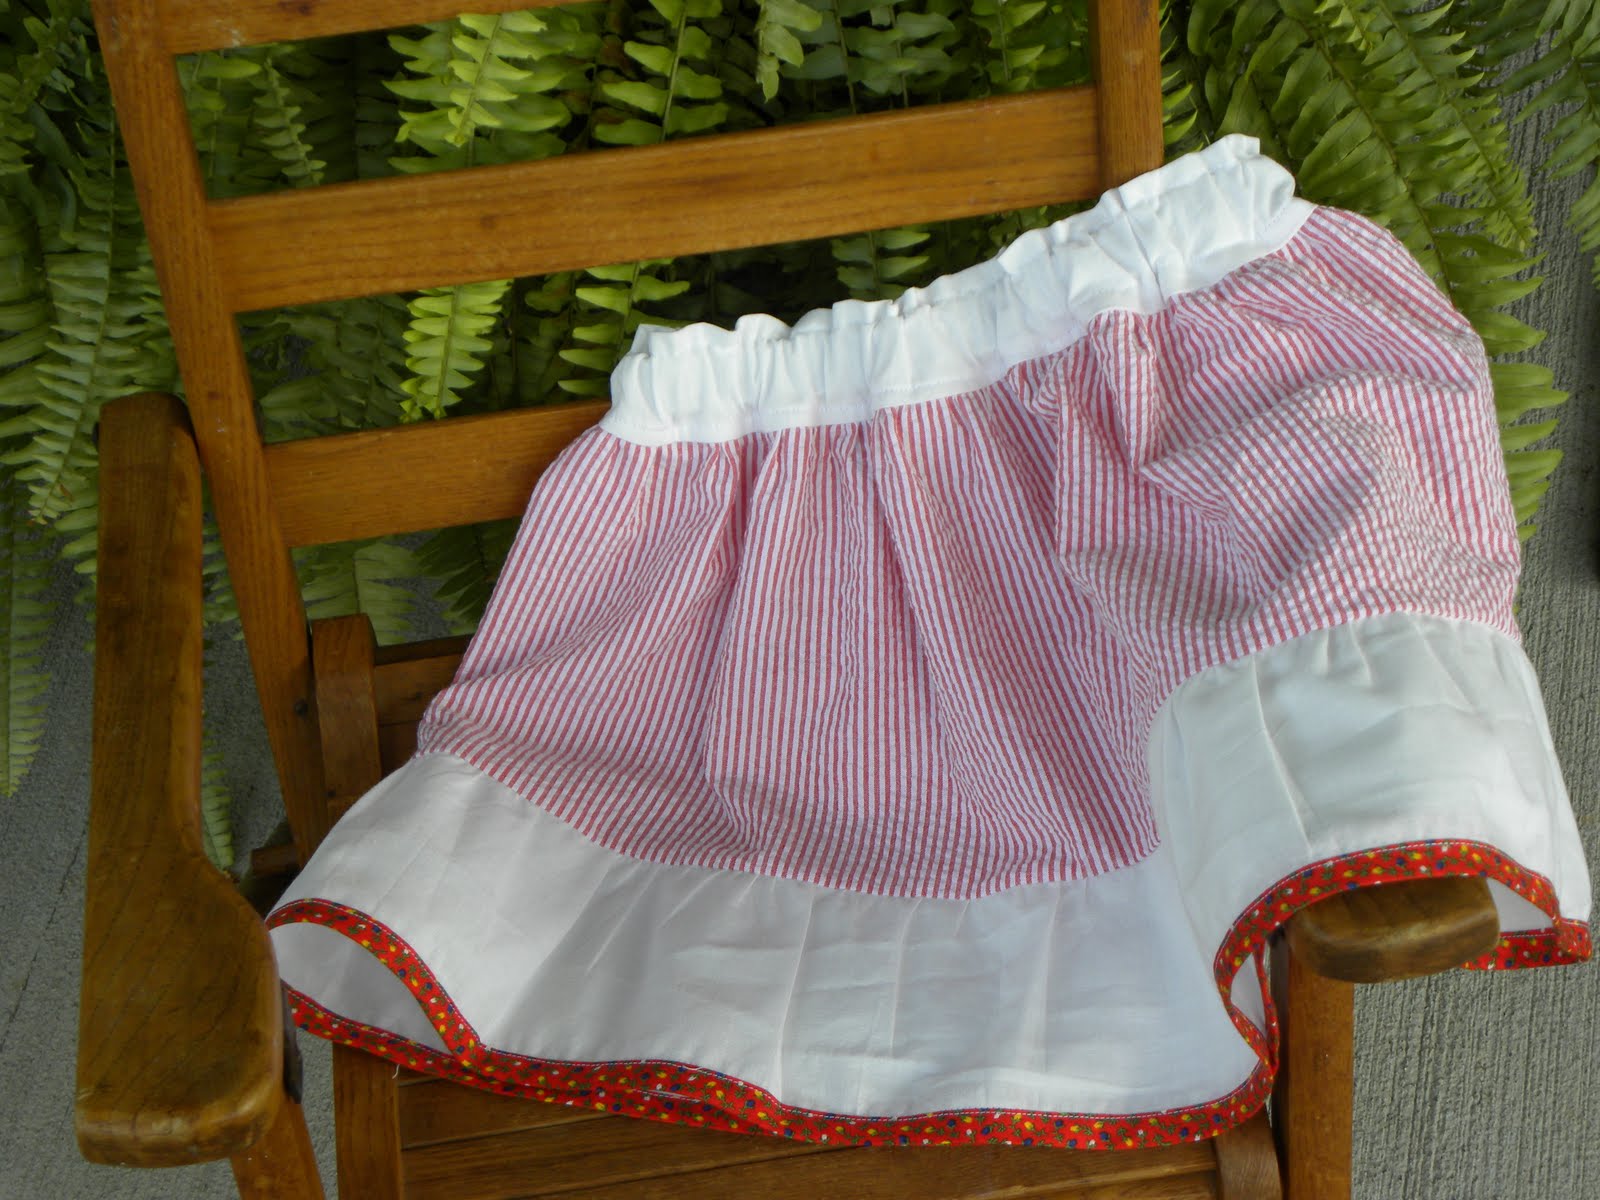
Here it is, September 2nd, and I have completed THREE projects in one day! I rewarded myself with a piece of pie. :) Two of the projects didn't really warrant a place on the blog, but just to fill you in on my productivity I finally stitched on ALL of the patches that the kids have collected from Build and Grow at Lowes. (6 months worth. Multiply that by three kids and you get an idea of how many I had to do.) I also finished Mistress's ballet shoe tote bag. Two projects that had been sitting in the procrastination pile done. Then I pulled out some of the stuff in my stash to do this project...a skirt for Mistress!

I have made this skirt before, the Market Skirt from Made. Today though, I pulled from TWO stashes, mine and my mom's! (Check out the picture, when was the last time you saw a package of bias tape for under $1?)
Several months ago when we were visiting my parents, I was in my mom's sewing room and came across several packages of bias tape from when I was a little girl. I commented that they were actually so old that they were cool again, so my mom told me to take them. Score! So I started with some red seersucker stripe and some leftover white broadcloth, added the bias tape and voila! Here is the end result! I'm planning to pair it with a white tank while it's still hot out and when it gets colder I can easily change the tank to a short or long sleeved t-shirt with or without a lightweight cardigan to keep her warm. Maybe tomorrow I can try out fabric rosettes, I've been wanting to take a stab at them for a while I think a headband to match this skirt would send her off the cuteness charts!