Showing posts with label Waste Not Want Not. Show all posts

Thursday, March 14, 2013

A Quick Hat Rack for an Army Room!

After making over the Professor's room for his birthday, I had one piece of board leftover from the shelves that I didn't want to go to waste.  The professor has a TON of hats in his collection and they didn't have a home, so I decided that the best use for the last board was to make him a hat rack!  Even if you include the cost of the board ($5ish) all I needed was 2 packages of hooks ($3 each) the same container of free sample paint, a stencil for the lettering ($2) and a black sharpie marker.  I cut the board down a tiny bit, freehanded with the stencil, attached the brackets, and added two hanging brackets on the back (that I saved from some artwork we bought so they too were free) and we had a hat rack that was LITERALLY the hit of the room.
 I hung it below the shelving above his bed and he's good to go!
One hat rack for about $10.  A great way to use up leftovers and make a 9 year old VERY happy!

Saturday, January 12, 2013

My 10 Favorite Money Savers

As is usually the case, January is when we cut back for a few months to make up for the more expensive months of November and December.  I thought I'd share a few of my favorite money savers, maybe you'd like to try some of them out yourself!

1.  Menu Planning  It used to be that I shopped without a list and used as many coupons as possible.  Unfortunately it ended up that I spent MORE that way.  Why?  Because by using the coupons I was buying things that we may or may not have needed and without the list I was forgetting key ingredients needed for a meal.  My husband used to look at me with a dumbfounded look and ask my why I needed to go to the grocery again when I was just there the day before!  Now I sit down and plan out a week's worth of dinners, add any other incidentals that we need for lunches and breakfasts, and shop from there.  I don't clip coupons much anymore (gasp!) because we eat almost entirely natural and organic and there are far fewer coupons for those products.  Before shopping I patrol my favorite coupon sites to see if there is anything that matches up with what I actually need and print the ones that work for me.  Even after switching to natural/organic and ditching the coupons, I actually see major savings by shopping only once a week and using a list!

2.  Home Haircuts  Yes, you read that correctly.  DH cuts the boys' hair about once every 4-6 weeks with a clipper set I got at Target for $30.  Once every 6-8 months we take them in to get it professionally cut and then in between he is responsible for the upkeep.  I trim Mistress's hair for her every few months and I even got REALLY brave a few weeks ago and chopped about eight inches off my own hair.  I went at it with the attitude that the worst that would happen is that I would have to go see a stylist the next day.  It worked though, so I saved myself an easy $50 and can get it cut professionally when I want to go a lot shorter in the future.

3.  Homemade Laundry Detergent  I've been using this for almost eight months now and will never go back!  One cup washing soda, one cup borax, and one bar shredded soap (I use Ivory) mixed well together will last me about 3-4 weeks and costs a fraction of what I used to spend on laundry detergent. I'm now spending about $3 for a batch that lasts me the 3-4 weeks instead of the $10-12 I used to spend on the Tide that lasted me 2-3 weeks.  It works just as well too!

4.  The Library  So this one seems like a no brainer, but it amazes me how many people don't go on a regular basis as adults!  Most people go for their kids, but stop when they've finished the kids section.  I tend to read 2-4 novels a week and I love to check out informational books so the library saves me a ton of money.  Ours even lends some books digitally which is awesome, has an interlibrary loan system to expand the materials you can get, and has great movies if you're willing to wait a little bit for them.

5.  Swagbucks  Over the last year and a half or so I've earned enough swagbucks for over $100 in Amazon gift cards.  I'm not consistent on it or I could earn more, but for a half hearted attempt that's not bad!

6.  Secondhand Merchandise  I am lucky to have a craigslist type site on facebook that is just for our neighborhood.  I can sell the clothes and toys the kids have outgrown easily and get cash to use for other things.  I've also found several things on there that save me tons of cash.  I love designer jeans but balk at spending $180+ a pair on them, but have gotten 2 pairs that retailed for $180 and $200 respectively for $20 and $25.  Still more than Old Navy, but fit much better, better quality, and will last a lot longer.  I've also gotten $1 DVDs and CDs for the kids, $3 kids boots (that retailed for $60) a beautiful used once 10 foot artificial Christmas tree for $30, a $20 floor lamp and $1-2 games, among other things.

7.  Prescription Roulette  We have a couple of allergy prescriptions that we fill every month, and I have no loyalty to any pharmacy.  I switch them around to whomever is giving away free money.  In the last 3 months I've gotten $115 in free groceries at two different stores and know that I can get $105 for sure in the next month and a half with the coupons I already have.  Totally worth switching!

8.  Ask For a Discount  We recently rearranged our living room and found that we wanted a small table in a spot that we hadn't had one before.  I found one I loved at World Market for $100, but didn't want to spend that much.  The next week it went down to $79, and when I called they said they had one left but that it was the floor model.  I asked for an additional discount, and was given another $10 off for some minute scratches that weren't all that visible and would probably have happened in a house with three kids anyway.  I got the table I really wanted for 2/3 what it cost in the first place!  (Plus we had some Christmas money and I make it a rule never to spend gift money on anything boring!)

9.  Plan Your Errands  By planning where you need to go, you save a lot of cash on gas.  If you find yourself constantly running out to get things that you forgot, you're basically throwing money down the drain with extra gas, mileage, wear and tear on your car, and wasted time.  I try to do all my errands in one day, or plan to stop at a place on my way to or from preschool each day.  Plus, if you run extra places you spend extra money on stuff you didn't know you needed.  (If you don't shop, you don't spend money!)  I use around 2 tanks of gas a month with this, and next year when all three kids are in school every day using the bus, I suspect I'll use even less.  Especially with the gorgeous SC weather and walkability of our community, since anywhere in our neighborhood is reachable by foot or bike including the kids' school.  I'm curious next year to see how long I'll be able to go between fill ups!

And last but certainly not least...

10:  Always remember my favorite motto:  Use it up, wear it out, make it do, or do without!


Friday, October 26, 2012

A Quick Cushion Re-Do

I decided a few weeks ago to re-arrange my front porch to allow for more seating (since here in the south the front porch is an extension of your living room!)  so I brought the two wicker chairs down from our top porch and moved the glider over and was thrilled with the results.  What I didn't love was the worn out old cushions on the chairs.  Not only were they mildewed and faded, but the red stripe kind of clashed with the blue and brown stripe.  Just a bit.  The old cushions were over eight years old, so they really didn't owe us anything!  I really didn't want to spend any money on the redo, so I decided to see how cheaply I could do the re-do.

I started by ripping apart the old cushions.  Not only did I use the old pieces for patterns to cut out the new cushions, but I also re-used the zippers and piping cord.  The fabric I already had in my stash, it is outdoor fabric that I bought at least six months ago and never got around to using it.  Technically I guess the fabric was my only cost, I bought about three yards at maybe $8 a yard?  Don't really remember...
 I assembled the cushions by working backwards, and put the new covers over the old foam filler which was still in great shape.
 When I was all done, I had new cushions that work great on the front porch and only spent money on the fabric.  Originally I was going to get rid of the ottoman thinking it made the space too cluttered, but I do like to put my feet up with a good book, plus it makes extra seating in a pinch or a coffee table.  (And I had enough fabric so why not?)  I'm thrilled with the result!

Friday, July 6, 2012

Another Refinishing Project!

I have decided that in addition to being frugal, I am also a glutton for punishment.  How else could you possibly describe someone who decides to refinish a dresser in the garage, in the middle of summer in South Carolina?  Anyway, I found this dresser on a local classifieds page for $30 and couldn't NOT get it for our guest room.  While it was definitely an older piece in need of some TLC, it was also solid wood, a good size, and had ample storage for our guest room.  And did I mention that it was $30?  Plus it was right up the street.  Bonus!

Here it is, in all it's pre-refinish glory.  Ugly old knobs, water marks on the top, and just kind of sad looking.  (Go ahead, be impressed that I remembered a 'before' photo.)
 Here I am mid-project.  It was at this point I was cursing the whole process and wondering why I didn't just go to Ikea...
 And then, after a coat of primer, two coats of paint, fresh stain on the top, and some new knobs, I was thrilled with the outcome.  I'm loving the way it turned out, and I finished in time for some of our besties to come for a visit!  In total, besides the $30 for the dresser itself, I spent $25 on new knobs and about $20 on paint, stain, and polyurethane for a grand total of $75.  Not bad for a brand new dresser!
And now you see why I've been MIA for a while.
Well, that and I was at the beach.  ;)

Saturday, May 26, 2012

Wine Cork Garden Markers

I like wine and I have a problem throwing away wine corks.  I'm not sure why, but I just can't seem to pitch them in the trash can after opening a bottle.  In my dining room I have three large vases, one with red wine corks, one with white, and one with champagne corks.  My jars have gotten full so now I have a large bag full of them up in my craft room.  I keep finding all these cool cork projects on Pinterest and since I have a plethora of corks I decided to try a few of them out.  Today, I made some markers for my garden using a few!

Super simple, and they didn't take more than a few minutes.  I used wooden skewers that I have been collecting out of my kids' Earth Fare meals for the last few weeks (Kids eat free every Thursday, up to SIX kids meals with a $5 adult purchase.  Love.) and the old corks that I have, (free, and free) and wrote the names of everything that I am growing this year and in less than five minutes had some really cute markers for my veggies!
 I can almost taste the zucchini bread now...
 I love these little onion sprouts, can't wait to use them in a stir fry or salad!
 LOVE my garden, and love that I can grow organic veggies so easily.  There's something great about heading out into my backyard to pick dinner!  I would have chickens if I could, but our HOA frowns on them...
In a couple of months this lettuce will make a great salad for dinner!  Yum!

Monday, May 21, 2012

A Crayon Container

I love it when a normally throw away type of thing inspires me!  A while ago I made this juice and realized that the container that was left would be perfect for something, I just wasn't sure what.  So I tossed it in my "figure out a use for it" basket and let it sit for a little while.  A few days ago I realized exactly what I was going to use it for...a travel crayon container!  Not only would it keep the crayons from getting crunched in a bag, but it also fits conveniently in a car seat cup holder.  Since we do a lot of traveling in the summer, I knew that it would definitely come in handy!

I started off measuring the size of the container and cutting a piece of scrapbook paper that I had in my stash to fit.  Then I mod podged it in place.  I also added some cutouts from a coordinating piece of paper and a circle for the lid.  Modpodge over the whole thing and we had a crayon container!
 Voila!  One finished container.  And again, the best part was that it was totally free!  I had all the supplies on hand already and the juice was even free.  I bought it with a coupon!
 Super simple and free.  Doesn't get much better!


Thursday, May 17, 2012

Something Out of Nothing

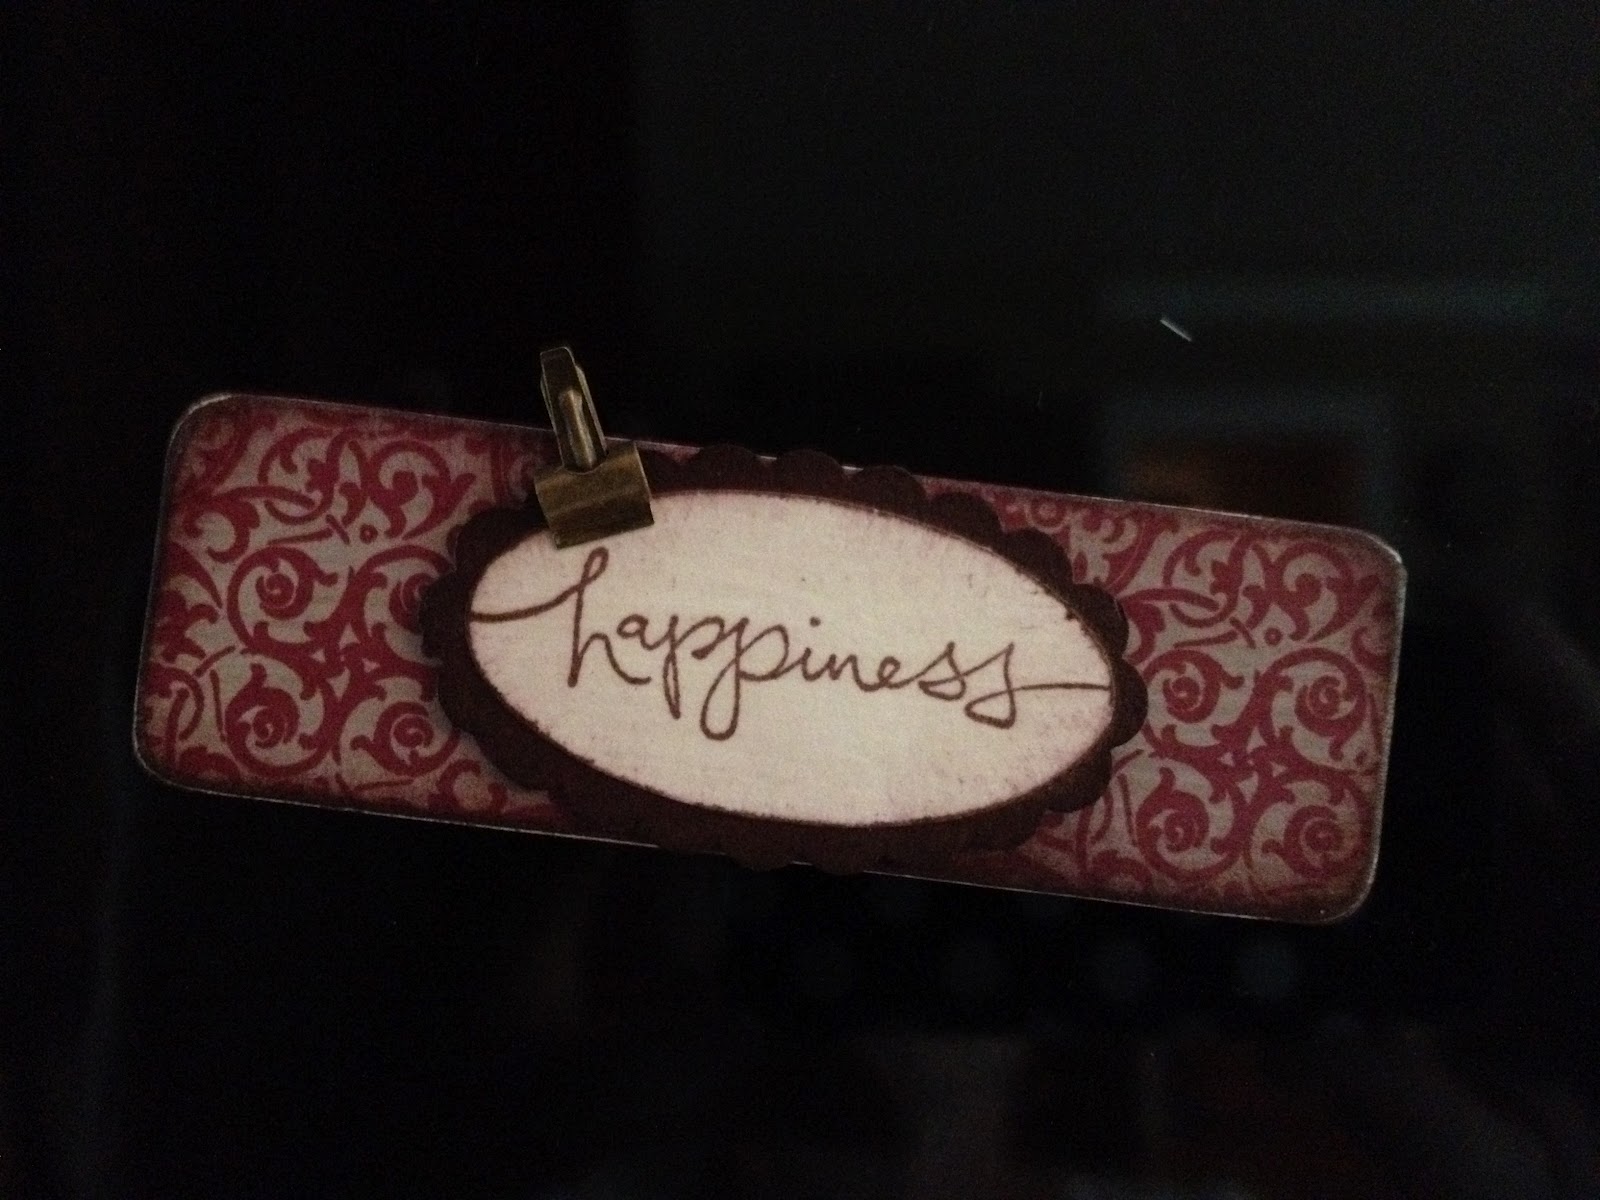
A while ago I got a magnet with some razor blades that I bought.  It was a nice magnet in terms of durability, magnetic hold, and size, but it wasn't exactly a magnet that I really wanted to display.  So, I got out my paper crafting supplies and got busy, and in less than 10 minutes had transformed it into a cute little magnet that I'm happy to have on my fridge!


I started with some simple supplies that I had on hand.  Since my kitchen has a lot of red and brown I picked these papers and card stocks.  I also pulled a couple of punches, a stamp, and a little clip embellishment.
 I started off by using mod podge to put the paper on and cut it down to fit the magnet after I had glued it on.  Then I sanded the edges and distressed with a little brown ink.
 
 Next I used my 'happiness' stamp and the punches and made this little oval tag.  I used the brown ink to distress the edges.
 Then I mod podged both pieces and let them dry.
 Finally I added some little dimensional foam stickies to the back of the oval to make it pop off the magnet a bit, clipped on the little clip, and had myself a little magnet!  And the best part is that it was FREE!!!  I love making things for the house, but the 'free' part makes it that much better!


Thursday, May 10, 2012

A Little Gift

As promised, I got back to the craft room this week!

Mistress has been invited to a birthday party this weekend for one of her friends, and even though the invitation said "no gifts please," I couldn't not take anything!  I decided that "no gifts" actually meant "don't spend any money" and raided my stash to make a quick little gift for a special girl.  I used one of my favorite patterns, the Jean doll from Bit of Whimsy Dolls and added an apron to her and in about an hour and a half had this girl all finished and ready to go to her new owner this weekend.
So, one project done, 873 left in the wings...

Thursday, July 28, 2011

Stashbusting September Preview!

In honor of the be-here-before-we-know-it Stashbusting September, I decided to throw together a few projects today. In keeping with the rules that will be in effect for September, I didn't use anything that I didn't already have in my craft room, and made three cute little projects that were all quick and simple!

First off, you might remember the pillows I made for our front porch a while back? Well we have this little folding chair that used to be DH's dad's when he was little and what better place is there to put something as cute as this than on the front porch? I made a small pillow to go on the back of it, since even Mistress needs comfortable pillows!
See? She's right at home checking out all the fun stuff going on around the neighborhood! Only took about 30 minutes to make the pillow from start to finish using scraps left over from the pillows I made for the grown up chairs. As for the next project, see the skirt that she's wearing?
Yup, made that too! I had a little under a yard of this blue and white seersucker that I picked up a while back from the remnant bin. I paid somewhere around $3 for it when I got it, and it had just been sitting around collecting dust. I made a quick skirt for myself, and one for Mistress using Dana's Simple Skirt tutorial. Under 30 minutes per skirt and we had some summery skirts to pair with tanks to keep cool down here in the summer.

Peek a Boo!
See the detail I put on her skirt? I had fixed a Belle costume for Mistress this morning and when I went to make the skirt the yellow thread was still in the machine. I liked the contrast, so I went with it and used it to put her skirt together. Paired with a yellow tank and a messy ponytail she is ready to take on the southern heat in July!
So there you have it! Three cute and simple projects using things I already had on hand, an hour and a half of time, and cleaned out a little space in my craft room. I'm getting really excited for Stashbusting September, and am planning to take the idea a step further. Stay tuned to see how!

Friday, July 8, 2011

Trash to Treasure

A couple of months ago, I was in spring cleaning mode. This particular spring cleaning mode extended to the outdoors as well, and one sunny afternoon my neighbor and I were pulling weeds when I noticed that some things had been dumped at the beginning of the walking trail through the woods next to our home. Since we live in a new development it's not completely uncommon to find random construction leftovers here and there, so I went over to pick up the discarded wood scraps and put them in the trash. One of the pieces of board that I picked up was this:
It didn't look like much at first, but then I turned it over and my mind started whirling. I immediately thought of what I could do with it! I cleaned it up,
Painted it in 'gilded endive,' which is from Mistress's furniture, the family plaque, and a whole host of other things that I wanted to turn whiteish. (I am beginning to think that I will never actually run out of this paint, but I digress...) Three coats did the trick because I don't actually own primer.
Then I sanded it to rough it up a bit,
Distressed it with a hammer and some nails,
Used a bit of stamping ink to bring out the bare wood, (stain would also work)
And added tealights! I also put some felt pads on the bottom to protect the table. I can already see this at Christmas surrounded by fresh greens!
Total cost? $0!!! For the record, I think this is the top part of a railing. I like it better as a candleholder, what do you think?

Saturday, March 26, 2011

Covered Box, Take 2


Have you ever woken up the morning after making a craft and realized that you didn't really love it? Yeah, that's what happened with my covered box. I'm not in love with the end result. So, this morning after Build and Grow with the boys, I took a quick trip to the garden department. NOW I love the end result! The Easter eggs will find a new home in something soon, but for now I definitely like this version much better! What do you think? Which did you like better?

Pink Hippo Party

Thursday, March 24, 2011

Covered Box

The weather in South Carolina has been amazing lately. That's great for exercise and fresh air, but not good for crafting. My kiddos have been outside from sunup to sundown and by default, so have I. Don't get me wrong, I'm loving it, but it would be nice to have a chance to get some work done! Mistress Monstress isn't in school yet either, so I can't even work when the kids are gone during the day so I don't have any time to get anything done! Oh well, I'm sure that before I know it the hot days of summer will be here and I'll get a ton of crafting done. :) Anyway, moving on...

This thing has been kicking around my craft room for months. Mistress Monstress got a set of wooden food in it at Christmas and although I wasn't sure what on earth to do with it, I couldn't bring myself to throw it away either.
Starting with osnaberg, I cut a piece (well actually I just tore it) several inches larger than my box.
Make cuts on each side from the edge of the fabric to the corner of the box. Starting on the side with the longer strip, fold up, glue, and manipulate the fabric until you have the first side covered. The repeat the process on the OPPOSITE side.
I folded and tucked until it was relatively neat.
Now you have the two shorter sides left. These two are easy, just pull them up and glue them down.
Done.
Add a ribbon to jazz it up a bit. Find the center of your ribbon and attach it with a tiny bit of hot glue at the back, then bring it around and tie in a bow.
These eggs are one of my treasures. I made them when I was a little girl with my Nana. Each of the little flowers was cut from a paper napkin, then decoupaged on and covered with glitter. I can still remember vividly sitting at her kitchen table as she patiently worked with me to create each one. Nana had them out every Easter, usually in a silver bowl with Easter Grass. When she died, they were one of the first things I asked for and I have made sure they come out every spring. They remind me of her. I miss her. Now they have a new home in the Easter centerpiece!
And Voila! One new Easter Centerpiece using one of my favorite mementos. After Easter season has passed, I plan to find some small terra cotta pots and use this as a little herb planter in my kitchen. I'll make sure to put up a post after it has been transformed!