Nearly seven years ago now when my oldest son was born, we received two baby bibs as a gift. They were beautifully handmade, very practical and I truly appreciated how thoughtful the person was who took the time to make them for us. There was only one thing, while one was blue with trains on it, the other...
...well, here it is.

Pink on one side with ballet hippos on the other side. It was cute and color coordinated, but in case you missed it in the first sentence, we had a boy. I can only imagine that the woman who made these didn't know what we were having and sent one for each gender just to be on the safe side. But the point is that we loved these bibs so much that my sweet little rough and tumble boy wore a pink ballet hippo bib because they were the most practical bib that we were given. It was large enough that nothing spilled down past the bottom and because of the button he couldn't pull it off like the velcro ones that we also owned. He wore it until his little brother came along and it was passed to the next rough and tumble boy in line. It wasn't until nearly five years had passed that the pink ballet bib was finally able to be worn by our little girl, and after almost seven years and I can't imagine how many washings, it is still going strong. Since we loved those bibs so much and since they weren't able to be purchased in stores, I decided to draft a simple pattern from the original so that I could make some of my own for baby gifts. Even though you may not have this bib in your home, you could make one similar using a large bib from the store as a jumping off point.
Project: Baby Bibs
Time: 1-2 hours
Skill Level: Easy Peasy!
Lay your bib out on top of some tracing paper.

Using a seam gauge, make small marks around the edge of the bib to add a seam allowance. I used 1/2 inch.

Make more marks around corners to keep the shape of the bib even.
After making marks around the edge, use a straight edge to 'connect the dots.'

One finished pattern.

Mark an approximate placing for the button hole.

Cut it out! Congratulations on making your first pattern!

Make sure to mark what the pattern is, and record the seam allowance that you used.

I like to use two coordinating prints, one for the front and one for the back. This bib will be for a boy, I chose not to use the pink hippos. Only a small percentage of boys can actually pull off that look...

Pin your pattern to the fabric and cut out a front, a back, and one out of batting. I like to use Warm and Natural, just be sure to preshrink that stuff otherwise the first washing of your new bib will end badly. I promise you.

Now you have three bib pieces cut out.

Layer your Warm and Natural first, your back, (right side up) second, and your front (wrong side up) third. Pin around the edges.

Mark a start and stop at the bottom, this is where you will leave open to turn the bib right sides out.

Now I have to apologize. I was making this for a shower gift and was about 20 minutes from departure time so my pictures are a little sparse. I still think I got all the important stuff though!
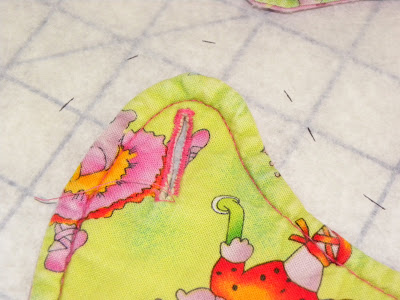
Stitch around the outside of the bib, leaving the opening at the bottom. Clip your curves using a pair of pinking shears so that your seams will lay straight.

When all your curves are clipped, you are ready to turn it right side out.

Ta-da! Now give it a good press with your iron.

Pin the bottom shut neatly where your opening is.

Topstitch around the edge. I like a contrasting stitch, so I used a taupe in my top thread and a cream color in the bobbin thread.

Add a coordinating button and button hole. You could use velcro if you want, but I like the button because baby can't pull it off. Make sure to sew the button on tightly, you don't want it to come off because it could pose a choking hazard.

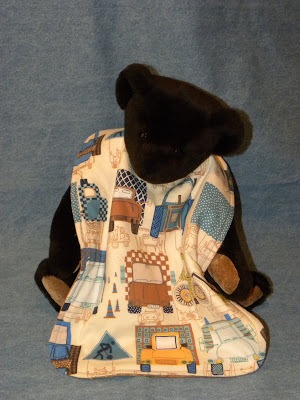
And voila! One finished baby bib! I'm sure I'll be making a lot of these, they are quick and easy and parents really do appreciate them. I think I'll keep the pink ballet hippo one for the future though. After all, someday I might have a grandson.


 On the left, the purple punch. We put the canisters on white cake pedestals so that it was easier to get the glasses under the spouts. On the right, ice water. We thought it would be really cute to float purple grapes in the water for some extra color. Just so ya'll know, grapes sink. Live and learn...
 For some simple decorations, we made some purple and white pom poms to hang from the chandelier and a purple bunting to hang across the tops of the windows. The bunting was really easy and SO cute! Seriously, 20 minutes worth of time and about $3 worth of fabric and ribbon. I'm sure there will be bunting in my house somewhere soon. I'm thinking over Mistress's windows...


 I like to start with the bottom layer. Take 5 diapers and roll them into a round shape. Tie tightly with string.
 Now start layering your diapers around the bundle of five. Don't worry about making it too even right now, you can adjust it when your layer is tied off.
 Continue layering around in a circle, building up your bottom tier of the cake. You will feel like you need 12 extra hands. This is normal. I would probably suggest you have a partner to help you the first couple of times. I would also suggest laying it flat on a table, I tried to hold it up to show you the process better and ended up exploding the layer in my lap. Also, having a two year old helper to hand you one diaper at a time is great to speed up the process. (Ha)
 Once you get all the way around, use string to tie your layer tight. At this point you can turn it on it's side and go around adjusting the diapers to make them even.
  Make two more layers. I start the middle tier with three diapers in a bundle, and the top tier with one diaper rolled up. My first cake turned out looking like a marshmallow, don't be discouraged if you have to take a layer apart and add or subtract to make it the right size.
 By this point in time, The Professor was home from school and 'offered' (cough *insisted* cough) to take a picture. Apologies to all for my scary lack of makeup. It was a crazy morning.
 When the three tiers are done, choose a ribbon to tie around the middle which will hide your string. For boys, I like to forgo the bows and use a diaper pin to fasten the ribbon around the middles. You can also add a topper of a small stuffed animal or blocks.